A Lesson in Lashes

In April’s issue of Seventeen Magazine, you will find a perfect example of how you can add lots of drama with individual lashes! You will fall in love with how they really elongate your eyes. At your local drug store or beauty supply, pick up Short, Medium, Long and Mini Individual Flare Lashes, or online you can find Combo Packs that have Short, Medium and Long’s and a separate pack of Mini’s. I prefer Duralash by Ardell Flare Individual Lashes. You’ll also need a lash glue, and I use DUO’s Eyelash Adhesive in Clear because it goes on white then dries clear. All can be found online at www.madamemadeline.com


First, I applied two coats of Mark’s Make It Big Mascara in Raven on Lauren’s top and bottom lashes. (www.meetmark.com) I always focus on applying lashes one eye at a time. Squeeze a pea-size dollop of the lash glue on the back of your hand. You want to give it a minute to get tacky, so I always do this first. With tweezers or your fingers, pull out 4 Long’s, 4 Medium’s, 3 Short’s and 3 Mini’s from their case and place them in separate rows on the back of your hand. Starting with the outside corner of your eye, place two Long’s on the very end of your lash line, as close to each other as you can get them. Direct them outwards at a 45-degree angle to create more of a cat-eye look. Directly next to the 2 Long’s, start adding lashes towards the center of your eyes in this order: 1 Medium, 1 Long, 1 Medium, 1 Long, 2 Medium’s then 3 Short’s. If you find that you don’t have a lot of space between your lash line and your eyebrow, making the Long’s look too costume-y, forgo the Long’s and instead use 6 Medium’s and 5 Short’s, same as above, with two Medium’s at the outside corners, then every other until you only have Short’s left. Repeat with your other eye. If you stick to this order, I promise you will have head-turning lashes!!

On your bottom lash line, place 3 Mini’s on the outside corners, carefully placing them between your own lashes. If you are lucky enough to have really long bottom lashes, use 3 Short’s instead. Just make sure with bottom lashes, you apply the false ones as if they are backwards! I use my fingers to apply all of the top and bottom lashes, because I really like the control of being able to get in there, but a lot of make-up artists prefer to use tweezers. Lauren also loves to use tweezers when she is applying them on herself before she goes out at night. Just have fun with it, practice until it becomes second nature, or have a girlfriend come over before you go out and apply them on each other!
Here are some more pictures from our shoot…


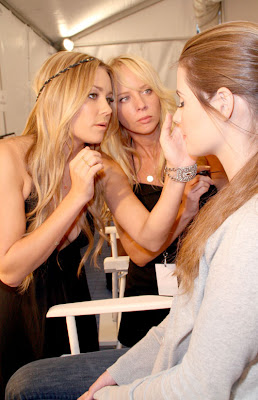
Here she is with the lovely Lo Bosworth, who had her make-up done by my colleague Natalie Miller:


All photos courtesy of Seventeen Magazine, Kenneth Willardt, Ardell and Duo. www.seventeen.com
Soft Spring Colors

One of my favorite make-up looks for Spring ’09. For this shoot on Jenna, I used a rosy pink lip color, a mosaic of petal pink on her cheeks and varied her eye color, using a base of light gold then switching it up between aubergine and aquamarine.
Foundation:
I used Hourglass Veil Fluid Oil-Free Foundation in Sand, a really luminous formula that fights the signs of aging. http://www.beautycloset.com/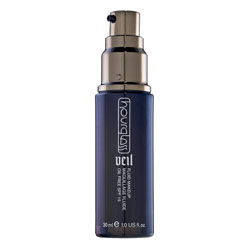
Eyes:
All over the eye lid and in the crease, I applied NARS Single Eye Shadow Duo in Isolde, applying the darker gold first then sweeping the lighter gold on top. http://www.narscosmetics.com/

Next I applied Estee Lauder Pure Color in Berry Ice from the lash line to half the width of the eye lid as well as along the entire bottom lash line with a thin eyeliner brush. It is a high-density pigment so I only had to apply one coat. http://www.esteelauder.com/ 
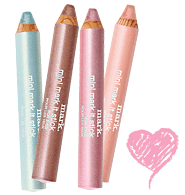
For a couple of the shots, I swept Mark Mini Mark-It Stick for the Eyes in Marina as a thick eyeliner along the upper lash line. I love all four of the colors for Spring because they’re very playful yet wearable. http://www.meetmark.com/
Cheeks:
For a Spring lightly-bronzed look, I applied Elizabeth Arden Sun Goddess Bronzing Powder in Medium in the hollow of her cheeks, across the top of her forehead, down the bridge of her nose and under her jawline. I love this bronzer because when you swirl your bronzing or powder brush in it, it grabs mostly the bronze color but the perfect amount of the pink highlight. http://www.elizabetharden.com/ 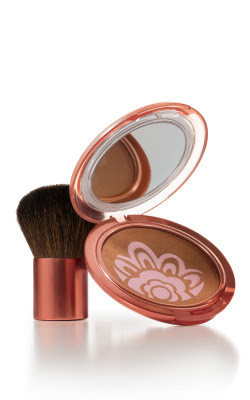
Next I used one of my favorite blush trios of all time, Scott Barnes Blush in Posh. With the darkest of the pinks, I swept it under her cheekbones. The medium pink was applied on the apples of her cheeks and the lightest pink above her cheekbones as a highlight. Scott’s products are currently hard to find because he is in between backers so whenever one is listed on eBay, grab it! Or check with The Beauty Closet and see if they have any more in stock. http://www.thebeautycloset.com/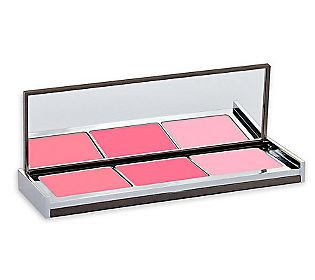
Lips:
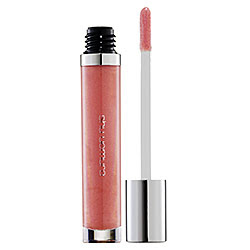
I applied a single coat of Shu Uemura gloss in PK382S, a must-have for Spring!
http://www.sephora.com/
Here are three more of my favorite shots from the shoot:


Photos courtesy of Randall Slavin, NARS Cosmetics, Mark Cosmetics, Scott Barnes, Elizabeth Arden, Hourglass Cosmetics and Estee Lauder. http://www.randallslavin.com/
A Trio Of Black Liner

Black Eyeliner served three ways! (Ok, I’ve probably been watching too much Top Chef!) Here is a quick course on the eyeliner techniques that I used on Annalynne McCord, Shenae Grimes and Jessica Stroup for 90210’s photo gallery, shot by Art Streiber. It’s a great example of three different ways you can apply black eyeliner: Kohl Pencil, Wet Shadow or Gel Formula.
Kohl Pencil on Annalynne:

For Annalynne, I used my trusty Shu Uemura Drawing Pencil in ME Black 1. It glides on with ease and I love its metallic concentration. I started in the inner corner of the upper lash line and dragged the pencil tip outward, slightly winging it up at the end. I incrementally made the line a little thicker as I worked my way to the outside of the eyes. I then drew a thin line across the bottom lash line and finished by rimming inside the lash line with the pencil. ** Tip: for a thin line, use the point of the pencil, holding it almost perpendicularly to your eye. For a thicker line, slant the pencil to a 45-degree angle, using more of the side of the tip of the pencil. Don’t be afraid to try holding your pencil at different angles — make-up is temporary and you can wipe it off and try again as many times as it takes for you to get the hang of it! 

Wet Shadow on Shenae:

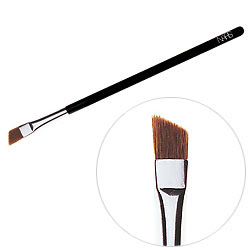
For a softer look on Shenae, I opted for an eye shadow powder, applied wet. This is one of my favorite techniques in make-up! First, take a slim and angled eye liner brush and wet it with water until it’s fully soaked. I love NARS Angular Eye Shader Brush 04. Next, swirl it around in a single black eye shadow until it is loaded with the color. In this case I used Night Breed by NARS, a deep metallic black that I adore because the silver specks catch the light but don’t affect the concentration of black color. On the back of your hand, draw a couple of lines to make sure you are happy with the consistency of the wet shadow while smoothing out any powder clumps. You might need to re-dip it in the shadow until you have it right. Just like I did for Annalynne with the drawing pencil, sweep the brush across your lash line, starting at the inner corners and increasing the width as approach the outer corners. This brush is especially brilliant for drawing a thin line on the bottom lash line because of the breadth of the brush. For a day look like this, it’s prettier to have a thin line of the bottom. You want to define the eyes in the day time and save the drama for Tuesday nights at 8pm! **Tip: For double the intensity, re-wet your brush, load it with more shadow and go back over the line.
.jpg)

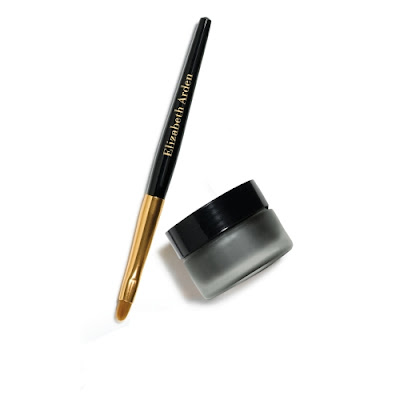
Gel Formula on Jessica:

For the ultimate definition of the eyes, without the extremity of a liquid liner, use a gel liner pot, like I did here on Jessica. When I first started in make-up years ago, we had to use grease paints for this effect! Now many lines have created gel liners, and one of my favorites that I used for this shoot is Elizabeth Arden’s Color Intrigue Gel Eye Liner in Black. It glides on smoothly with ease and comes with its own liner brush. Use the same method as the wet shadow liner and watch your eyes become piercing with every coat! **Tip: One coat for a more subtle look, 2-3 coats for extra drama!
Whatever your personality, find the method and products that work for you… or do what I do and use a different technique for different moods! Always remember to have fun with it and NEVER be intimidated by make-up. It’s one of your creative times of the day to play!
Photos courtesy of Art Streiber, The CW, Shu Uemura, NARS and Elizabeth Arden. http://www.artstreiber.com/ http://www.thecw.tv/ http://www.shuuemura-usa.com/ http://www.narscosmetics.com/ http://www.elizabetharden.com/
Art Imitates Art!


This is probably my favorite cover of all time! Photographer Art Streiber and Entertainment Weekly Photo Editors Lisa Berman and Michael Kochman are the geniuses behind the concept… inspired by this 1966 cover of Esquire, they wanted to show how Lauren practically has to live her life on camera. My inspiration came from a young Bridgitte Bardot; heavy lashes and a nude lip like they wore in the Sixties. It was such a fun day and I used all Mark Cosmetics. Lauren is wearing:
- Face Xpert Flawless Touch Foundation in Natural Glow
- Xpert Face Shimmer in Sun Glo
- Good Glowing Mosaic Blush in Hush Baby
- Make It Big Lash Plumping Mascara in Raven
- On The Edge Liquid Liner Hook-up in Cleo
- Mini Mark-It Stick For Eyes in Shell
- Spring Flip For It Color Kit in Los Angeles
- Mini Mark-It Stick for Lips in Apricot
All products can be found at http://www.meetmark.com/ and if you haven’t discovered the line yet, you will FALL IN LOVE!! It is such a playful and incredible line and the prices can’t be beat. The hook-ups are my favorite and I can’t get enough of their Flip For It Kits. I’ve headed up the make-up for three of Lauren’s fashion shows, using only Mark products on the models, and my team and I were blown away… and you can become a Mark Rep and make extra money selling to your friends. WARNING: you and your friends will become obsessed like Lauren and I are!

Photos courtesy of Art Streiber, Entertainment Weekly and Esquire. http://www.artstreiber.com/ http://www.ew.com/ http://www.esquire.com/
Nude Cheeks and Lips Make It All About The Eyes

Here is a great example of how you can really make your eyes stand out by keeping everything else in the nude family. Amy Hixson, one of my favorite Victoria’s Secret models, let me try this look out on her for a play shoot with uber-talented photographer Randall Slavin. We took all of the shots at a playground around the corner from his house, without anything but natural light; and here are some of the images, un-re-touched. So any aspiring models/make-up artists out there should keep in mind that you don’t need much to put together a great photo shoot! Here’s how you can re-create this look:
- Skip foundation and only apply concealer on any dark circles, redness around the nose or blemishes. This will keep your skin alive and fresh. I used Cle de Peau Concealer in Beige.

- Apply a cream blush with a foundation brush, starting at the apples of your cheeks continuing across your cheek bone and ending at your temple. I used Kevyn Aucoin The Creamy Moist Glow in Tansoleil.
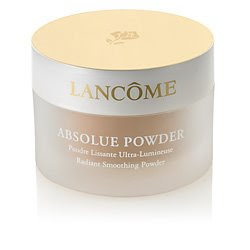
- Using a fan brush, dust a light highlighting loose powder over the area where you applied the cream blush. I used Lancome Absolue Radiance Powder in Absolue Pearl.
- Rim the inside of the eyelids with a black eyeliner pencil. My favorite for this is the Stila Kajal Eye Liner in Onyx because it has incredible intensity and is super-creamy.


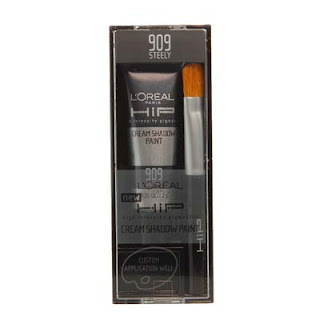
- Use a cream-based eye shadow paint to frame the entire eye, making it as dramatic as you are in the mood for, but as a rule, I wouldn’t go all the way up to the brow bone! Here I shaded in the entire eyelid and as the day went on, I kept going in and making it wider for more drama… test shoots are about playing and seeing how far you can walk the line before it crosses over into drag queen! Here I used L’Oreal HiP Cream Shadow Paint in Steely with the accompanying brush because I love the high intensity of the pigment and it never creases.
- I applied 3 coats of Max Factor 2000 Calorie Mascara in Rich Black then glued on 8 Long Individual Lashes on each outside corner.
- I first went over her entire lips with foundation to bring down her natural lip color, then I applied Estee Lauder Pure Color Lipstick in Tiger Eye, one of my favorite nudes out there.
- Finally, I skipped the powder and let her natural glow shine through.


Here are a few more shots of the look. If you’re inspired, I’d love to see shots of you re-creating this look! Email to me@amynadine.com and I’ll post them!


All photos courtesy of Randall Slavin, Cle de Peau Beauty, Lancome, Stila Cosmetics, Kevyn Aucoin Beauty, Estee Lauder, Max Factor and L’Oreal. http://www.randallslavin.com/
Top 10 Beauty MUST-Have’s
I get asked all the time about the products that I can’t live without. After years of doing make-up with every brand on the market, here is a list of my top ten favorites:
 FOUNDATION:
I am obsessed with Giorgio Armani Beauty’s Designer Shaping Foundation and Foundation Brush. It is the closest thing to airbrushing that I can find… foundation perfection as far as I’m concerned. I wear it in shade 8 but most of my clients are a 7. Available at http://www.saksfifthavenue.com/.

CONCEALER:
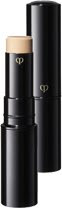
The best concealer that I’ve ever found is by Cle de Peau Beaute, which you can find at Neiman Marcus and Saks. It covers EVERYTHING! From age spots, dark circles to freckles and blemishes; and the best part… it doesn’t crease or flake. It is genius. Available at http://www.neimanmarcus.com/.
CONTOURING:

 BLUSH:


POWDER:

I could not not not live without my NARS Botan Kabuki Artisan Brush. It’s an investment ($75) but lasts forever and is my secret weapon for blending and buffing after I’ve applied bronzer, blush and highlight. You never want to see where your bronzer ends and your blush begins, but you have to have definition between the two. This blends together any lines so they run together and gives everyone the perfect glow. Available at http://www.sephora.com/.

LIQUID LINER:
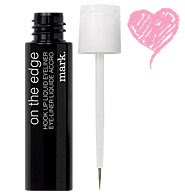
There is no better liquid liner on the market than On The Edge Hook-up by Mark Cosmetics. It doesn’t flake or feather and is the most user-friendly brush on the market. Any one can draw a perfect line like a pro with it! I use it most in Cleo (black) but I personally love it in Nefertini because it still adds the drama that only a liquid liner can, but is softer for a freckled-face strawberry blonde like me! And at $5, it’s a steal!! You can find it at http://www.meetmark.com/.

MASCARA:
I adore the department store brands, but I swear by Max Factor 2000 Calorie Mascara. Years ago when I was assisting Meg Ryan’s make-up artist, he laughed at me for spending so much money on mascaras for my kit. He introduced me to 2000 Calorie and I’ve been hooked ever since. It gives major volume and length but doesn’t clump, which is hard to find. And because it is under $10, I buy a new one for each client and give it to them that day, because I don’t believe in sharing mascaras and disposable wands are poorly designed and never give me the effect I want. Available at CVS Stores and http://www.ulta.com/.  LIP COLOR:
The silkiest lipstick I can find is Cle de Peau Touche de Rouge. They are super slim and incredibly creamy. They are a luxury at $50 each, but you feel like a queen every time you treat your lips to a fresh coat. Luckily, a tube can last a long time, because the color has staying power that lasts for hours. It is every lips’ dream and my favorites are 101, 105 and 106. Available at http://www.neimanmarcus.com/.

OK, I know I’ve actually listed eleven of my favorites here… but Top Ten sounds much more David Letterman and I really did try… but I couldn’t decide which one to drop from the list, because I love them all!!
Photos courtesy of Cle de Peau, Giorgio Armani Beauty, Hourglass Cosmetics, Mark Cosmetics, Lancome, Max Factor, Smashbox Cosmetics, Yves Saint Laurent and NARS Cosmetics
Sultry Glow

I loved working on this shoot with Whitney Port for the cover of Vegas Magazine. The styling was off the charts and I loved the way Mara did Whitney’s hair! It looks like we were in a studio but really we were at Jack Guy’s house, shooting on his balcony! Here is a great example of what I call a “sultry glow.” I love keeping the make-up pretty simple… so people will think, “wow she looks really beautiful,” not “whoa, she’s got a lot going on with her make-up!” A great way to achieve this is to keep everything in apricot/nude tones. Her eye shadow is a classic light shimmer (Stila All-Over Shimmer in *7). I used On The Edge Liquid Liner in Nefertini from Mark Cosmetics — a really beautiful steel/copper color that is a softer alternative to black. She has 3 medium and 3 long individual lashes on the upper corners of each eye, NARS Blush in Luster and Cle de Peau Touche de Rouge lip color in 103.


![]()


All photos courtesy of Jack Guy, Mark Cosmetics, Sephora, Cle de Peau and Vegas Magazine. http://www.jackguy.com/ http://www.vegasmagazine.com/
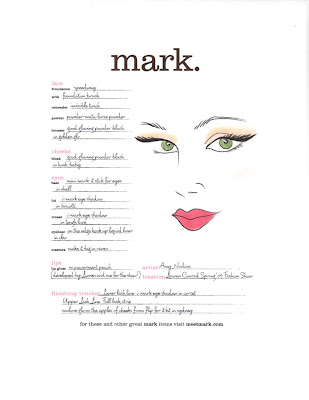
Lauren’s Spring Fashion Show at LA Fashion Week

I love this shot of Lauren walking down the runway after showing her Spring ’09 Collection at the Mercedes Benz LA Fashion Week. She worked so hard for months and finally got to see the fruits of her labor… the most fun was heading up the make-up team, sponsored by mark cosmetics. http://www.meetmark.com/ We went for a contrast of strong, defined eyes with a feminine glow, showing you can be strong and powerful without giving up your softer side. And the best part was mark let us create a lip gloss exclusively for the show! Such a blast! We named it mPowerment Peach and the proceeds go to the mPowerment campaign, Lauren’s charity with mark to empower young women who have found themselves in abusive relationships. I’m so proud of it and it really stood out on the models! Here are some more pictures from the night…


Backstage with the models right before showtime:


How to Re-Create Lauren Conrad’s Signature Look
Here I am on the E! Daily 10 Show talking about how one can get Lauren Conrad’s signature make-up look… the funniest parts are when I say “matte matte powder powder powder!!” and “toilet” on national TV! My bathroom is so small that I rest my elbow on the back of my toilet when I’m drawing a perfect line with a liquid liner, but most people have bigger bathrooms! Lordie lordie… But the basic things for you to remember when going for Lauren’s look are:
-
No eye shadow on the eye
-
Black liquid liner, starting out thin in the inside corners then incrementally getting thicker as you wing it out and up
-
Nude lip
-
Bronzed cheeks
-
Lots of individual lashes placed almost on their sides to enhance the cat eye look
-
Matte, powdered face
I used all Mark products. http://www.meetmark.com/ Good luck and have fun! And as always, feel free to email me if you have any questions at me@amynadine.com.
Video courtesy of E! Networks http://www.eonline.com/
Sharing a quick video with you!
Here you can see my “reel,” a compilation of the commercials and music videos that I’ve worked on that I’m most proud of. My favorites are the two beauty commercials of Lauren Conrad for mark cosmetics, two very long days and nights shooting around Hollywood but well-worth it!! The song is from one of my favorite artists, Carla Bruni, and I had a lot of fun trying to edit everything to go with the changes in the tunes.